Building a Classic Playboy Studio Set [NSFW]
One of the things in classic Playboy-style photography, as in any studio photography, is that not only the model, her wardrobe and lighting are the focus. It’s also about the set and not just any set. When working under tight schedules with the editors and evaluating what the set possibilities should be, the editor usually makes suggestions about the model, her background and hobbies or career which should also reflect on the pictorial so the readers can better relate.
There have been endless discussions during production meetings regarding what the set should look like. Usually the set building decision ends up being mutual between the editor and the photographer. Wise editors know that if the photographer is cut out of the creative process that may affect the end results. I remember having sets built with all the bells and whistles and then the editor or Hef had changed their mind and suggested to build a different one. If you are in L.A., the Warner Brothers back-lot is one of the best places on earth to rent pretty much any kind of set imaginable. If you are on the East Coast, you may have to build one with a little more imagination since there is not as much variety available as there is on the West Coast.

Sets are everyday life in studio photography. However, since times have changed and budget cuts have replaced the endless production budgets, the lavish sets are now real locations. I am not sure if the savings are as great since great locations cost sometimes even more than building a set itself. To build a standard Playmate set can cost upwards of $5000 for a 3 to 6 day rental plus the set builders and time.
If you are creative yourself and have an access to a studio, and are talented enough to swing a hammer and have real passion to impress the editors, this is one way to demonstrate your hidden talent not only as a photographer, but a producer and a set builder handy-man. Most photographers seem to choose the easy way out! I was on a mission to get noticed by the right editors in the beginning of my photography career so by building the sets for half the cost was a part of my plan for getting the editors on my side which ended up working out quite well. It can work to your advantage to cut some of your client’s or editors’ workload and show your true colors and what you are capable of doing. I promise you, it won’t go unnoticed!
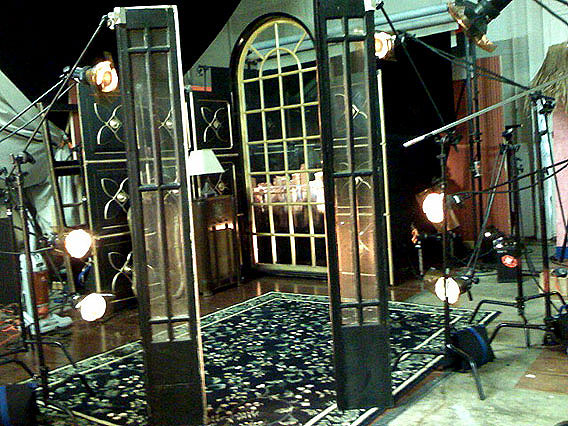
Alright, let’s dive in and see this set get built step-by-step and get some of the thought process as this set was being constructed by me and my assistant. I apologize for the fuzzy behind the scenes images which were taken with what was then a state-of-the-art digital pocket camera.
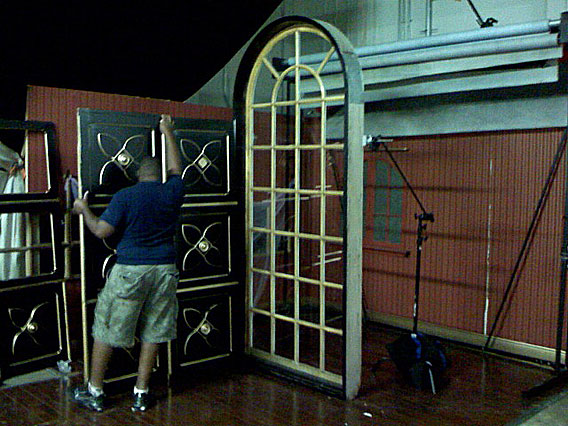
You may notice that we started building this set inside another red-striped wall set that was being used the day after for a another Playmate shoot. The same sets are often re-used and just painted or modified for variety. My assistant Michael can be seen here setting up wall panels that I found in an antique store in some small town in the middle of Florida. They looked crappy so I painted them black and gave the embossed trim designs a little gold paint to make it look like an elegant old house.
The window frame I found in another antique store and luckily all the windows were still intact. Again, with a little paint our castle started to take a shape. You can see that everything is held together with C-Stands and Cardellini clamps. C-Stands are especially convenient since they also come with an arm-extension that can be extended in any direction unlike the A-stand. Just make sure to load a few sandbags on each C-Stand to avoid accidents.
 The walls
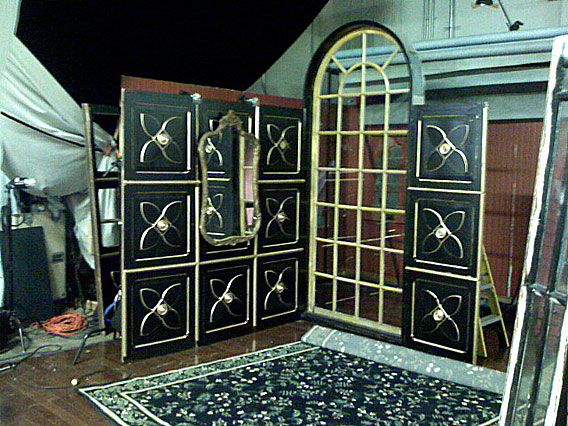
We had a nice fake wooden floor from the earlier set that was going to be used the day after again. I immediately felt that the direction I was going needed a carpet to make it cozier and home-like. We actually ended up trying 5-6 different carpets before settling for the right carpet pattern as seen below. The whole idea was to have an elegant feel since the wardrobe that our model was going to be wearing had to accommodate the interior design and patterns on the set. I am quite sure that many of you are looking at the mess on the side of the set wondering if the studio was teeming with rats. Well, busy studios are not always the neatest places since there is one production after another waiting in line and the main focus is always on the final product instead the side-show that will be outside of the camera frame. I also hung that mirror on the wall as a reminder that I needed to use it somehow, but not on the wall as it hanging there in the photo.
 The carpet
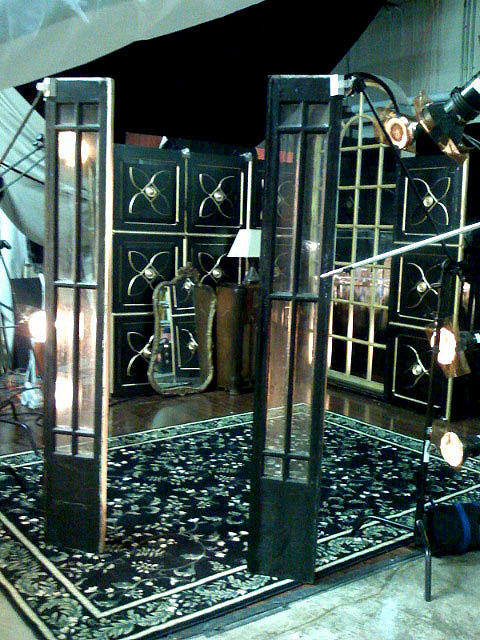
Moving on. Below you can see that the carpet rolled out and we left few feet between the set walls and carpet so we could capture light reflections on the wooden panel flooring coming from outside/behind the set. The two door frames were actually there when the model was interacting and posing. Here’s an interesting concept that often gets overlooked by many photographers, which is the separate focal fields as seen in this set.
You have four separate focal fields in this set as follows:
- Foreground
- The element ground (where model will be located)
- Background
- Background 2 (the far background outside the window)
 The four separate focal fields
The door frames were again held in place by C-Stands and with arm-extensions and Cardellini “L” clamps. The small skinny windows on the both door frames were purposely made to look foggy/smoky with a special spray that adds particles to the window surface. Even dry hair-spray will do the same trick if you have nothing else available. The particles on the windows add a realistic look and feel when caught with back lights.
 The city view
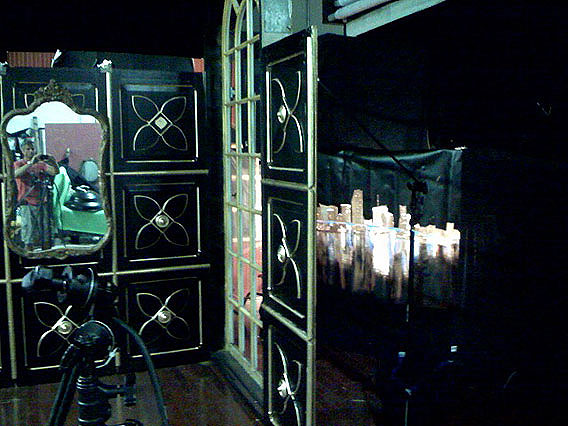
This view reveals the big window frame. It’s actually an image of Miami by night that was printed to a large transparent film, which was then lit perfectly from behind. That gave us the illusion that the house was a water-front mansion with a city view. Remember that none of this would really work unless you have a sufficient amount of space and depth in your studio of chosen location. The distance between the city poster and the large window fame is about 4′. The distance between the door frames and back window is about 12′.
 Additional props – Radio and night lamp
Then we added an old antique upright radio which we purchased from an antique store for $200. The $50 night lamp came from Pier 1 Imports and the mirror found a perfect place right next to the radio which added a realistic atmosphere instead a set that’s too perfect. Keep in mind that when you shoot anything where you have a mirror, that the mirror image should not fall dark and should reflect something instead infinity. For the final set we also added a palm tree on camera right, behind the right side door frame.
 Ready for action
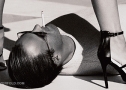
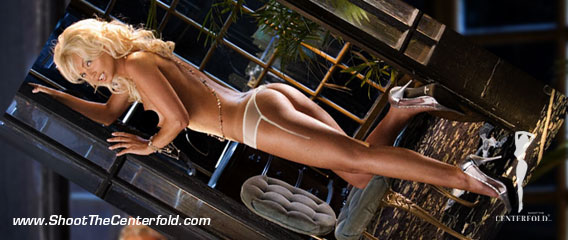
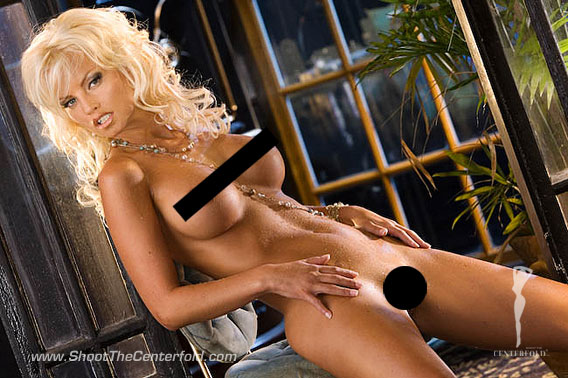
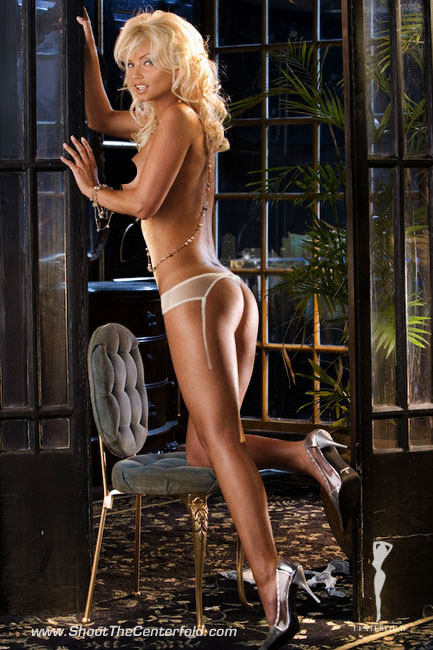
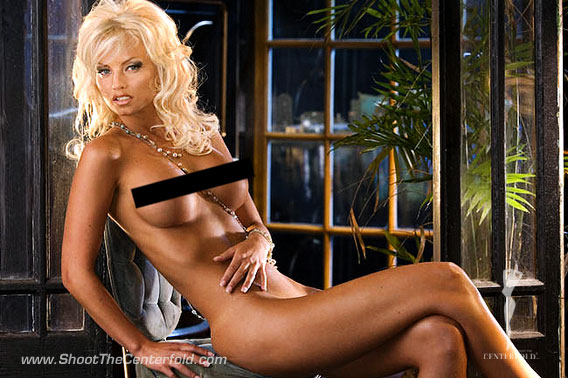
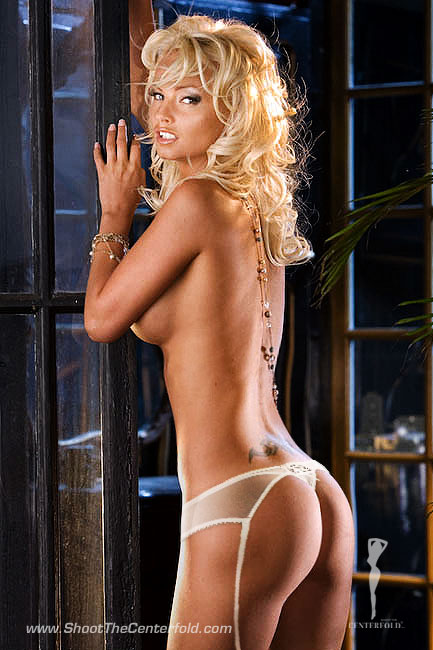
Voila! Here you see the final set with the lights and a perfect view of Miami in the background. This set had 16 strobe-lights but we are not getting into that setup right now. Would you like to learn more about the lighting aspect? Please visit our store for our educational lighting books. So what’s missing? The model, of course! But before we wrap up this blog post, I would like to bring up the surface elements on set  and how the light affects them. It is good to keep in mind that when you choose props, walls or anything else that you should consider how to they will look under strobe-lighting. Not everything looks the same in strobe-lighting as it does in the natural light.
If you have a sharp eye, you may notice that in the final images, a couple of things are different. Where is the lamp? What happened to the radio? The radio was swapped out with a dresser that blended with the background better. As far as the fate of the nightstand lamp? We shot variations with it and without. This is a common practice to get variety in the pictorials. Editors can change their minds and a smart photographer will give them options by shooting the same set with and without certain props just in case they decide they props aren’t working or they simply don’t like them.
~ Jarmo Pohjaneimi

 All images ©Jarmo Pohjaniemi


© 2015 Copyright ShootTheCenterfold.com. All rights reserved.