Here Comes The Summer: Miranda Kerr and the Lens Flares
Lens Flare “Tip!” after the pictorial ⬇︎
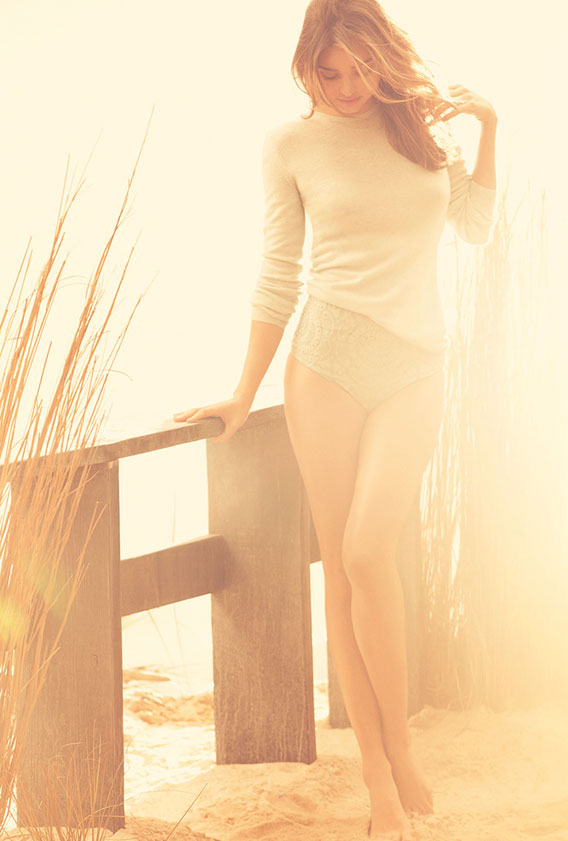
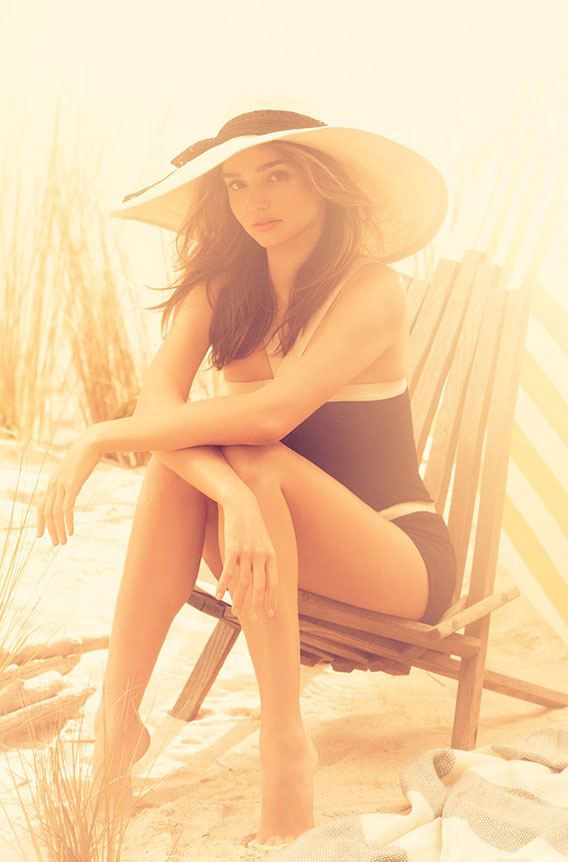
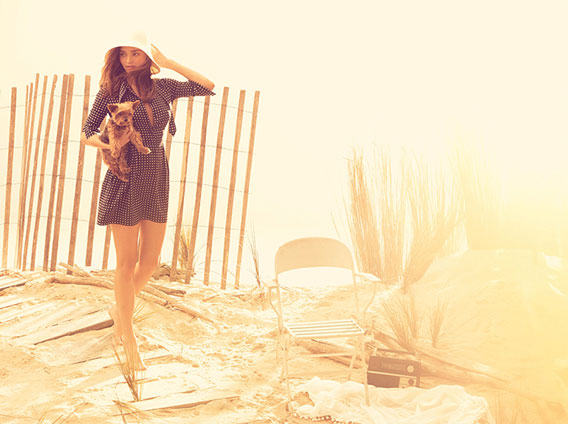
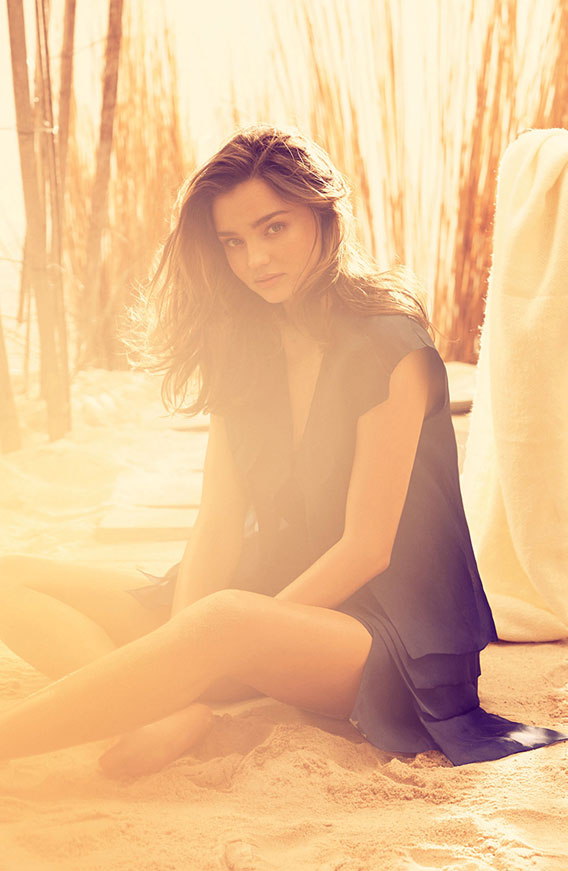
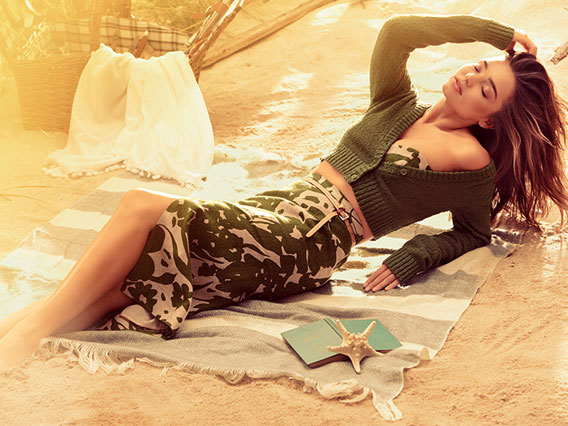
Your choice of models will make or break your photo shoot. You can’t go wrong with a beautiful model like Miranda Kerr. Everything else could go wrong including wardrobe, makeup, or the final editing in Photoshop when adding additional sun rays or flares. In this pictorial shot by Alexi Lubomirski and seen inside British Harper’s Bazaar is a good example of added lens flares that support the scene and add a fashionable atmosphere to the images. What we often see is photographers that tend to add just one subtle glow-flare in the outside of a crop-frame which then slightly bleeds over the image. This is not a such a bad thing but it is quite obvious to the trained eye.
 What I like about the Miranda Kerr shots is that there is no denying the added flares. The “let it shine style” has become a very popular enhancement method in fashion and it’s breaking into glamour. Who doesn’t like a little “everlasting sunshine?” But it may be just a fashionable trend in photography that will soon pass. Who knows? But in the meantime, it does add some additional magic to the image (as if Miranda Kerr wasn’t enough).
The set, which is most likely in a studio environment, looks great. This set resembles countless Playboy beach shoots that I have done in the same way except they were more detailed lighting compared to Alexi Lubomirski ‘s version which is more modern and what is in style and selling today. If you analyze the images you can spot the grass stabs and the sand that’s too detailed to be a natural beach. But the point of the shoot is not to make you believe that you have landed in Bora-Bora either. Instead, the name of the shoot says it all, “Here Comes The Summer”.




[Images: Harpers Bazaar]
TIP! Before you start adding lens-flare to your images, consider choosing an image that would already look believable having had flare. Make sure there is a directional light source that you can exaggerate with the flare. I see a lot of lens flare that is irrationally added and the image will tend to be very “cheesy” for lack of a better word.
Here are a few simple steps for creating leans flare in Photoshop as seen in this pictorial.
1. Open the desired image in Photoshop and always make a duplicate layer so you don’t destroy the original one.
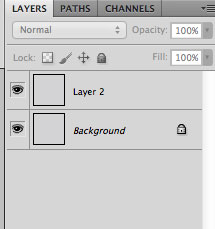
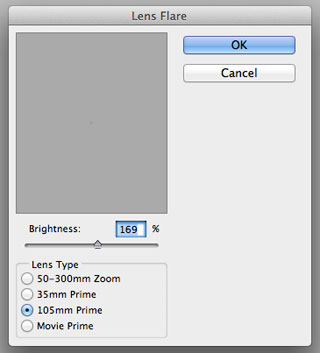
2. Then go to Filter/Render/Lens Flare. Choose The 105 Prime. The 105 prime is the best choice of the lens flare filters due to the lack of cheesy orbs the other ones add.
3. Set the brightness between 150 and 170 or more depending on the desired look. Place the lens flare in accordance to the light that is already hitting the subject.
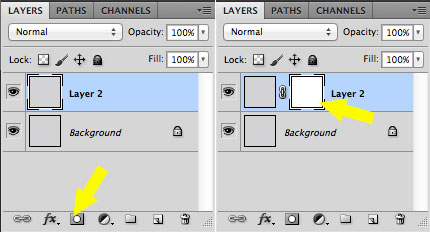
4. Create a layer mask for that layer and use a large super soft black brush with a low opacity between 1 and 10% to erase the orbs. Make sure to set your brush color to black . Change the brush size accordingly to erase some of the flare off as necessary.
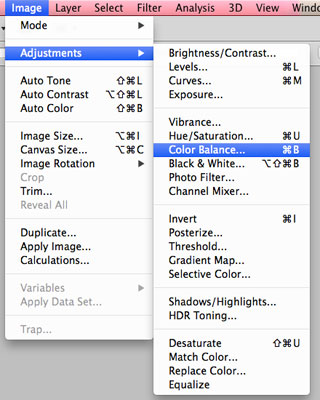
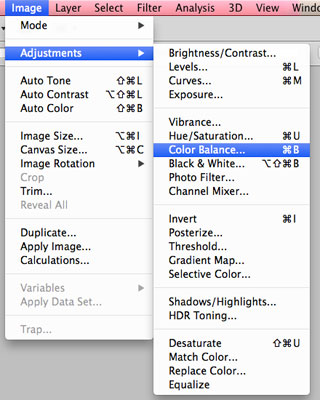
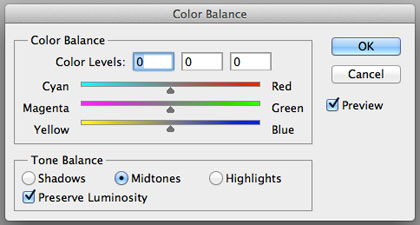
5. Often the color of the added lens flare does not match the tonality of the original image. You can adjust this easily. Make sure to select the layer with added flare. In Go to Image/Adjustments/Color Balance.
Don’t go over board. You should not be + or – more than 10 to 20 when working with realistic color spectrum scales. Have fun and add some color and flare to your images!

© 2014 Copyright ShootTheCenterfold.com. All rights reserved.


